Saturday, May 29, 2010

It has been a while since I last updated but I am still here plugging along. I tend to shut down a little when it is cold out but it seems like summer has finally reached San Diego and I am coming out of hibernation. I hope to up-date regularly and always look forward to any comments.

I recently joined the SD Farmers Market CSA (Mission Valley Farmers Market location) and am working on my second week of produce. In the first week I got “normal things” that I recognized… cabbage, tomatoes, multi-colored eggs, citrus and an avocado. I also got stuff that I had to figure out what they were… loquats, very tasting and giant seeds and some kind of a root looking thing like a radish, turnip or parsnip thing… never figured that out and it ended up as worm food.

This week’s box contained some recognizable things, some almost familiar stuff and a couple of surprise items. Cabbage again, green onions, cantaloupe, some kind of cucumber thing, sun-dried tomatoes, a big yellow citrus thing???, a couple of small orange looking things and a container of mulberries (marked on the box).

As a kid growing up in northern Illinois I would eat handfuls of mulberries during the summer and come home with purple hands. These mulberries in the box were similar but not quite the berries I grew up with.

After taking inventory of what was in the box it was time to get creative with some of the ingredients. Making a muffin seemed like a good way to use some of the CSA produce and my Internet search began. I found a few basic recipes and then I modified them to fit my needs. My goal was to produce a mulberry/orange muffin made with eggs, orange and mulberries from the CSA. That changed after I zested my orange and cut it open to juice… I now have Mulberry and Blood Orange Muffins.


Mulberry & Blood Orange Muffins

¼ cup softened butter

1/3 cup sugar *

2 beaten eggs

2 cups flour **

5 teaspoons baking powder

1 teaspoon salt

juice of one blood orange

2/3 cup milk ***

½ teaspoon vanilla extract

zest from one blood orange

½ cup mulberries ****

Preheat oven to 400 degrees. Cream butter and sugar together. Add eggs and mix well. Mix in 1 ½ cups flour, baking powder, salt, juice, milk and vanilla. Sprinkle mulberries, orange zest and remaining flour and stir lightly. Bake in grease muffin pans (with or without baking cups) for 25 to 30 minutes. This recipe made 12 muffins. I especially like them served warm with a pad of butter.

* If you like a sweeter muffin you could increase the amount of sugar to 2/3 of a cup but then you may need to increase the amount of liquids used.

** You can use all-purpose or half and half all-purpose and whole wheat. I do a lot of baking in my bread maker and like to use whole-wheat flour when ever possible. If you or your family doesn’t like the whole-wheat flavor or texture then use just all-purpose flour.

*** The total volume of juice and milk should be 2/3 of a cup liquid unless increasing the amount of sugar. I would not increase it to more than a cup or you will have a very wet batter.

**** I wore plastic gloves while removing the stems and chopping up the mulberries to keep from turning my hands purple.

I would think that this recipe could be easily modified to reflect what other fruits are in season. I also think that other spices could be added to adjust flavors… cinnamon and nutmeg comes to mind.

I am very much enjoying my time with SD Farmers Market CSA and think that if they could put something in the box that says what stuff is and/or have some recipes to go with some of the produce packaged it would help me to enjoy the box a little more.

Thanks again and keep up the GREAT WORK.

CSA member since 5/21/2010

Friday, August 21, 2009

NEVER ENOUGH TIME OR PATIENCE!

Hello and best wishes from San Diego, California. I usually work four days a week and have Friday, Saturday and Sunday off. It is Friday and I just think that it is funny that all week long I make plans in my head on what I am going to do on my days off and usually end up sleeping in late and missing out on accomplishing my GOALS.

Today was a compromise between sleeping in and getting up early and getting things done. I was able to get a lot accomplished today and stayed on schedule (even if you do realize that I have the most loosely structured schedule in the world).

I have been trying to find out why my avocado tree has been dropping its fruit. My late nights of insomnia have paid off. Searching the internet leads me to believe that I am having a fertilizer issue, or better yet, a lack of fertilizing my tree issue. I started the season with an eight-foot tall tree that had a large number of little baby avocados growing. The fruit would get to the size of nickel up to the size of an extra large chicken egg and then the fruit would end up on the ground. I have hopefully remedied the mass extinction of fruit by applying a good helping of avocado and citrus fertilizer. As an aside, the orange and the lemon tree also got a helping as well. I am down to between 3 or 4 fruit left on the tree and just hope I caught it in time to get at least one fully grown avocado.

I have also tried to grow some bush beans in the garden but it seems the sow bugs, or something, finds the shoots to be very appetizing and eat them to the ground before they can get their second or third leaves. My work around for that has been to start some seeds in reused drink cups and when I get to the second set of true leave to put them in the ground. I am seeing minor leave damage after a week or so but the beans seem to like the head start.

I didn’t even make to the end of a full week with my new worm beds before I became the IMPATIENT ONE again. I didn’t see enough activity from my worm egg containing compost so I went to the local bait shop and bought 2 cups of red wigglers. $5.35 later I now have worms in my farm. The little cups that they came in said “50 Red Wigglers” and I have seen local listings in Craigslist for 1.5 gals of worms and their bedding $15 -- suggested as startup for 1-2 people. We will see how the bait shop worms work out and this could always be my next step.

We should have a nice new solar array on the roof with the next 45 days or so if everything goes right. The plan that I am doing is through Akeena Solar and Sunrun. I am putting up around $2700.00 and then buying power from Sun run at a given price (more or less) for the next 18 years. Sunrun installs and maintains the system and over time my bill will stay the same as power costs increase. That is the plan and even though my electric bill should currently say about the same it just feels eco-responsible to be helping to offset my electric needs by producing some of the power on site.

San Diego is usually a very sunny place and the nice change for today was a brief rain shower… We are currently in a level two drought so any rain is a very nice change. It is great to see how everything just looks fresher after a short little rainstorm.

Don’t be affair to leave a comment or pass along some information that you feel might be useful. Remember that you can make a difference and...

Reduce, Reuse and Recycle.

Saturday, August 15, 2009

Photos that I wanted to put in my blog

These are the photos that I wanted to include with my blog but I ran into issues on blogger.com when I try to place pictures with text. This is the finished worm bed in its house under a plant stand/table. the bottom dish is a rolling pot saucer. Should make maintenance easier.


I bought the twin pack of Rubbermaid Rough Tote cargo boxes to build my worm farm. They are 14 gallon boxes, light doesn't make it through the plastic and the lids have very nice locking handles.


This is a view of the holes drilled in the upper side of the worm box. These holes are use for ventilation and the size is small enough that it should keep most UNWANTED guests out of the bed. There are also similar holes drilled in the bottom of this box as well for drainage.


This is kind of an exploded view of the part that make up the worm bed. The wheeled saucer dish is going to be used to move things around for maintenance and care. The bottom box (unaltered) just had the top removed and a couple of pavers in place to provide ventilation and a place for OUT OF BOUND worms to escape to. This is were the worm juices will collect. The top box will contain the worms, bedding and food. This is were the casing/worm poo will be collected from.


This is an inside view of the bottom box to show the paver placement. This raises the top box high enough to allow the ventilation holes in the top box to BREATH and the pavers should also offer an escape for any wandering worms and keep them from drowning in the WORM JUICES.


This is the filled worm bed. started out with a layer of torn strips of newsprint (San Diego Weekly Reader). The strips were moistened with water (moist/not wet), some pureed kitchen scraps were layered next and then finished off with about 2 inches of compost I had previously processed. No visible worms in this compost but it seems to have quite a few worm eggs in it.
NOTE: each egg may contain between 2 to 20 worms.


It may be difficult to see but at the tip of my finger is a small golden looking pearl. This should be the future of my worm bed. There are quite a few of these eggs mixed in with this compost and I hope that all conditions are right for a population explosion of worms.


Please leave any comments or questions you may have. If you want to share your successes and/or failures that would be appreciated as well. Also, I am still very interested in solar and wind on a homemade scale. Gardening is very strong on the agenda at this time of year and if anyone is interested in a seed swap I have large hard shelled pear gourd (about 10 to 12 inches tall), luffa sponge seeds and Italian squash/zucchini seeds available.

Reduce, Reuse and Recycle

Raising Worms and other UPDATES

I have been playing with the idea of building a worm bed and this week I have made the leap. I tried doing this with NO BUDGET in the past with a very primitive cobbled together setup of empty kitty litter containers and I realized that SIZE does matter! I also share a home with my partner and I quickly found out that aesthetics is very high on the list for a happy home life.

I went to our local Big Box Store (Costco) and bought a two pack of Rubbermaid Rough Tote cargo boxes. These are 22.8 X 16.3 X 12.5 inches and in a beige/tan color. Light does NOT pass through the sides and the lids have a very nice locking latch. I drilled a series of 5/32-inch holes in the bottom of one container (24 holes evenly spaced and also drilled holes around the top approximately 2 inched down from the upper lip. This is to allow for drainage and air circulation.

I choose this size drill bit for two reasons, I had it and it was a good compromise for the size holes I have read about on the Internet. Most sites recommend a 1/8-inch hole on the bottom to allow for drainage of liquid build up but not large enough to allow your wiggles to get out. The air holes around the top lip can be approximately ¼-inch to allow airflow but not let to much light in to annoy your worms. I have seen some sites that call for larger air holes for better circulation and some even get into the 1.5 to 2 inch sizes and place a net or screen over the holes. This may be a modification in the future if needed.

We get a weekly magazine in San Diego that is available at most store for free. One READER torn into inch strips is enough to fill the box about ¾ full before moistening the paper. I found out the paper should be moist by not soaking and that the worms will use this as bedding.

I have been running my kitchen waste through a blender recently to aid in reducing my processing times in my compost tumbler. I took about 2 cups of this chopped and drained mash and spread that over the moist paper.

The final layer in my worm bed is made of a layer of previously composted material from my winter compost. This was collected and screened before I was composting my worms to death. During the winter I was able to keep red wigglers going in my compost bin but that has changed. I don’t know if it is just that it is getting warmer or I am getting better at getting the temperatures up in my composter (the right mixes of greens and browns).

My last red wigglers were a spur of the moment purchase at a local bait shop. I just dumped them into the composter and I was amazed at how quickly the one little tub of wiggles soon filled up the tumbler. They did great and the compost during that period always seemed to have lots of worm eggs.

I placed the un-altered cargo box on a rolling pot stand (for ease of moving and tending to the farm). In the bottom of this box I placed two broken pavers. This will provide addition airflow (it raises the holes on the worm box) and in the event that any worms do work there way outside of the box they then have something to climb up on to keep from drowning. You may ask what I mean by drowning? Worm farms will produce “Worm Juice”.

The following information is from the Ashfield Council website (http://www.ashfield.nsw.gov.au/page/composting_and_worm_farming.html) but I did do a spell-check on it and changed some of the words to U.S. English spelling. Not to say that the words were spelled wrong, just not AMERICAN.

Using your worm farm products


The two products produced by your worm farm are ‘worm juice' (the liquid that drains directly out of the farm) and ‘vermicast' (or worm poo). Both can be used as plant fertilizers indoors and out but should be applied in moderation.

Worm juice collected direct from the farm should also be diluted to a weak tea color before applying to plants. This is especially important for pot plants. Vermicast can be dug directly into the soil of your garden, but you shouldn't place large amounts directly near the roots or stems of plants as it is nutrient rich and has the ability to over-fertilize your plants. Vermicast can also be mixed with water to make ‘worm tea' which can be watered on plants and lawns and which is less potent than applying solid vermicast directly. Mix a handful of vermicast in a bucket of water to make a weak tea colored brew.

Wormy Facts

Worms eat half their body weight a day

1000 worms weigh 250grams (approx ½ pound)

Worms are hermaphrodites, but need two worms to mate

You can tell a worm is ready to reproduce when it has a distinctive ring around it's neck.

Worm eggs are small yellow spheres about 3mm in diameter. Look close and you can often see them in your worm farm

One egg has 2-20 worms inside

Worms will double in number every 2 or 3 months

Worms regulate their own population size according to the limitations of their environment, e.g. how much space and food they have, so your farm will never be overpopulated. If only humans were as smart!

There are a lot of worm farming sites on line but this is one that is pretty easy to understand.

I put my FARM together today and decided to see how long it would take my worm eggs to hatch and start coming up some worms that I can see. If I don’t see results in a timely manner I might either opt for another trip to a bait shop or ordering some worms online or look for a local supplier.

I intend to be careful with my bin and work with keeping the temperature in a workable range, keep the lid in place to keep down unwanted flies and pests, and learn how to make sure that I don’t come up with an ODOR problem (again, I want to maintain a happy home life).

I look forward to seeing if worm casings and worm casings make a visible difference with both my container plants and my garden veggies.

A couple of other hot topics at home is that fact that we are probably going to be getting solar panels installed to help offset our power consumption and give us a better feeling about being greener. The solar site evaluation was done yesterday and the readings put us in around 97-98% efficiency and we are working with a company called Akeena Solar. They have a couple of different options available and it looks like the “TIME SHARE” plane is the one we will go for.

You have a lower down payment and then you have a fixed monthly bill to the solar panel folks. They maintain the panels, clean them and they get the tax credits but that is the trade off for not having to front the total cost. The cost over 18 years comes in around $2300.00 instead of $18,000 up front and around 5 to 6 K tax credit at the beginning of the year. If I opted for buying outright I would do away with most of my electric bill but then I would have to maintain the system, work on the finance and file the tax paperwork. With the time share plan it is around $2500 to $3000 down and around $90 a month to the provider on top of whatever is left over for the electric company. It gives me a very feel good warm fuzzy feeling and that is all that really matters.

The other thing is the Grounds to Gardens program at Starbucks. You just call up, ask them to save you some used coffee grounds and then you have input for you compost bin or new worm farm.

Stay in touch; let me know what you are thinking and what you think about what I’m doing in San Diego.

Reduce, Reuse and Recycle.


Sunday, July 12, 2009

BACK DOWN TO ONE...

Hello from SUNNY San Diego… The temp is 86 degrees today and it was decision day for the Composter from Costco.

We are back to being a one composter family at this time. The ECOmposter didn’t work as well as I expected it to and it had a few little quirks… There were 3 main reasons that I returned the product and they are as follows.

(1) I felt that the wheels on the base for rolling it might have been a little undersized.

(2) The material that it is made of has a tendency to sag/give when it was in the sun and because of the dimples formed at each wheel site made it extremely difficult to rotate.

(3) I also thought that the internal air tubes tended to keep the raw ingredients of the compost balled up into a ball at the center of the unit.

If I had a grassy back yard to roll the unit around on I might have opted for the regular base but my gardening area is basically concrete and gravel with a couple of raised beds. I did find it easier to rolled around than rotate on the stand but the concrete was putting excessive wear on the outside of the composter and I felt that it would significantly reduce its working life.

Now that I have pointed of the faults I found with the ECOmposter I must say a few good things about it.

(1) It gave me a very rewarding feeling when I was able to complete the jigsaw puzzle of pieces to get it put together (might just be a guy thing.)

(2) Adding yard and kitchen waste was very easy.

(3) It has to be the easiest composter I have ever tried for emptying. You roll it to a spot, remove one end cover, rolled it over and remove the other end cover and lift up the composter.

I am not a master composter and these are only my opinion about the ECOmposter. I have a very limited supply of browns to go into my composter and have to rely on shredded paper, and peat moss to balance out my kitchen waste and lawn clippings. I have been opting for paper at the grocery store when asked “Paper or Plastic?” because the brown bags seem to really work well in my mix. For those that want me to say “NEITHER”, I am not at that point yet.

I do want to give a shout out to COSTCO. They are very easy to deal with for online or in store purchases and they have to have one of the easiest return systems in the world. I brought in my paperwork, the ECOmposter and they asked a couple of question. Within 10 minutes I was in and out and they even reimbursed me for the shipping when I ordered my composter online. Yeah COSTCO!

What is growing in my garden this year to get the benefits of my composting successes? Tomatoes, potatoes, zucchini, yellow squash, a couple of sunflowers and one pole bean that decided to reseed itself from last year. Since I didn’t notice the beans until they were well on the way to coming up with another batch of seeds for the next generation.

I have recently planted a variety of gourds. I was able to get into a seed exchange on Garden.web a couple of years ago and got a small box with about 10 to 15 different hard shelled gourd seeds. The leftover seeds are now in the 3 to 4 year old range and not sure if anything will germinate and grow but they are at least getting a chance.

This was also a year for removing and moving things around in the landscape. A warm weather variety of lilac was removed and given to my boss. A tree fern now has a new home outside in the patio area at work. A potted Italian lemon tree is now growing happily in the ground. My naked lady lilies, various agapanthus, spider plants and papyrus plants have all found new homes due to either craigslist or sdfreecycle.com.

As I get older I am now loosing my thought that a plant is forever and now realize that it is OK to give one away, compost it or just putting it in with the green waste for curb side pick-up.

I have put up a new wind mill (decorative only) made from an old bike wheel. I haven’t lost the wind turbine dream. I am still working on things but life just seems to get extremely busy and full at times.

Have a great summer, enjoy the weather and Reduce, Reuse and Recycle.

Tuesday, June 23, 2009

What would MARTHA do?

While at work today we ended up having a short discussion about pickles. The usual comment is to “ASK MARTHA”. In this case Martha is me. It seems that the young ladies that I work with figure that I can do anything and know the answers to almost everything that is either kitchen, garden or do-it-yourself based. For a guy of my stature, 6’3” and around 280, I think that the title is a stretch but I will except it. It goes along with the other title of “Shrek Hands”.

The topic of discussion today was pickles. I remember growing up helping my mom make her wonderful polish dill pickle in a large 25-gallon crock. What was in the recipe eludes me to this day but I do remember putting in a crusty slice of german rye bread and then weighing everything down with a large plate. Summers would be spent reaching into the crock and pulling out a pickle and munching on it. Eventually mom would be happy with the batch and then the remaining pickles ended up in jars. They were great from the jar but the "dip and eat method" from crock just seemed to add a little more fun to the experience. With the knowledge that I have gained, I now realize that these pickles were made in the fermenting style of making pickles.

I have tried to grown cucumbers for pickling in my limited garden space but my results are lest than stellar. I don’t know if it is tied to the decrease of bees to pollinate the flowers or if it my lack-luster and carefree approach to gardening. Either way, I ended up at the local produce market today and bought a few pounds of nice small French cucumbers (about 5 to 6 inches long).

The rest of my shopping list included white vinegar, ginger root, dill, garlic bulbs and pickling spices. After a quick search on the Internet I came up with at least a half dozen recipes for basic dill pickles. As my usual approach to cooking is , get the basics and then modify them to my own needs.

Some of the pointers that I found very useful and thought I would incorporate were the use of nickel size slices of ginger root, slightly crushed whole gloves of garlic, soaking the cucumbers in an ice-water bath and slicing the cukes into spears to speed the process along. With my finished product in mind I began the process.

I decided to work on a small scale and only put up two quarts of pickles. I placed my jars in a large pot of boiling water to sterilize them. In the bottom of each jar I put in two nickel sized slices of ginger, two crushed cloves of garlic and a couple sprigs of dill. I quartered my cukes and then packed the jars tightly and then topped then off with a couple more slices of ginger, crushed garlic cloves and another sprig or two of dill. I brought 2 cups of white distilled vinegar to a boil along with 2 to 3 tablespoons of pre-packaged pickling spices. I ladled this into the jars until they were filled. A skewer came in handy to get any air bubbles out of the jar and then I put the jars in a pot of boiling water for a few minutes before sealing the jar lids tightly.

I did have to add a little of the boiling water to top off the jars, 2 cups of vinegar was just a little shy of filling up the jars. I made sure to get a good portion of the boiled pickling spices in each jar and then toped each jar with a nice pinch of course salt.

I have a problem with being patient and that is the main reason I decided to go with the spears rather than the whole cucumber. It seems that you can get pickles ready to eat in a few days rather than a week or so if you use the whole cucumber. It was also easier to fit them in the jar when they were cut into spears. I also gleaned from the internet that the flower end of the cukes should be sliced off to keep your pickles from having problems with the enzymes that may or may not be present.

Well, I have two jars of pickles put up and I have to say that after being in the jars for less than and hour they are actually looking like pickles. The color has changed from a bright shiny green to more of a muted green and I just know it is going to be hard to wait a day or two to try my pickles.

One last note on the dill pickles is that once they reach the flavor and texture that pleases you then you need to refrigerate them.

I did end up with a few cukes left over and since Ron (my partner) does have a taste for old-fashioned bread and butter pickles I thought I would try to make some for him as well.

This time I sliced the cucumbers into coin shapes (you just have to love a food processor for this step). I also sliced a large white onion. I mixed the cucumber and onion together in a large bowl. On the stove I incorporated 2 cups of distilled white vinegar, 2 cup white granulated sugar, ¼ cup of coarse salt and about 3 tablespoons of pickling spices. I brought this to a boil and then when everything was dissolved I poured it over the cucumber and onion mix. This was sealed in a cover plastic container (I only had so many jars) and then placed in the refrigerator.

I have to admit that it only took about an hour before the bread and butter pickles had the taste I remember as a child and Ron gave them a thumbs up as well.

I am think that I will be coming up with my own pickling spice mix though. The one I bought has something that resembles crumbled bay leaves and the texture/feel in your mouth leave a lot to be improved upon.

I will leave an update on the response to the dill pickles in a few days. This was a spur of the moment follow-up to a random conversation at work today. When it is all said and done I probably spent more to make pickles than it would have cost to just but them at the store but then money wasn’t the issue. I may complain at work about the “MARTHA” handle but in reality I kind of like it. I like to be able to do anything that comes my way and I appreciate that fact that the people that know me really think that I can accomplish anything I set my mind to.

Remember to Reduce, Reuse and Recycle. It is also good to remember to share what you have, weather that be your knowledge, the produce from a garden or the fruits of your labors. The Golden rule often pays great dividends.

As always, comments are greatly appreciated.

Friday, June 12, 2009

We are now a TWO COMPOSTER family...

I am sorry for the delay in updating but work has been all consuming for a while. I also tend to shut down a little bit when the weather turns cold and the sun doesn’t shine as much as I would like.

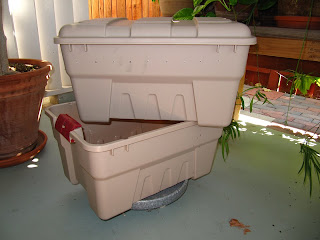
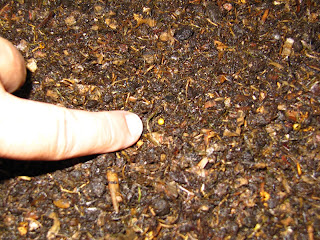
I have been using my Envirocycler Composter for a few months. I have decided that to get the most out of my composting experiences I needed to get a second composter. Since it takes about 3 to weeks after putting food scraps in I either was running into storage issues. I was also over-filling the composter and making it hard to tumble. The hoarder in me is having a hard time letting the smallest scrap of vegetable scraps going into the garbage.

I was at COSTCO recently and saw a composter tumbler that just seemed to have everything going for it. It was on sale and reasonably price thru Costco on line. The cost was 199.99 plus tax for a final total of $217.49.

The Envirocycler and the ECOmposter do have different compost volumes, 52 gallons for the Envirocycler and 71 gallons for the ECOmposter. The BIGGEST difference was that the Envirocycler is basically ready to go out of the box and the ECOmposter with base has 586 pieces that need to be assembled. It took me three nights to put it together but on a scale of 1 (EASY) to 10 (DIFFICULT) this would be a 3. The directions are very easy to follow, the tools needed are minimal, and a lot of the steps are repetitive. The hardest step for me was putting the two halves together due to the 32 tabs that need to line up. I must say that it did give me a very good sense of accomplishment to get it completed without having to ask for help.

I have been using the Envirocycler a little over 6 months now and I have found a few issues with it. (1) The door/hatch will let some compost leak out when I am rotating it. I don’t know if it is due to the way it connects to the drum or the fact that it is a single point attachment and a single point hook. I would like to see a better hinge design. (2) If I do over fill it the compost becomes hard to keep centered when tumbling, likes to drift to one side or the other and then the rollers get a little clogged with the compost that leaks out from the door. (3) The final issue I have is with the compost tea part of the build. The cap for the tank is very poorly fitted. The cap is very loose and the thread that are supposed to hold the cap are not very precise. This in conjunction with the way the tank is formed makes it a little hard to empty the tank without having a lot of the compost tea sloshing around when I try to pour it out.

With all of these faults that I have pointed out ( and I have to admit that these are just issues that I have encountered) I would still say that the Envirocycler is a very good product. Would I purchase it again… I think that I will see how the ECOmposter works and then I would make a final decision.

I did buy another tumble composter in the past. It was made out of a recycled 55-gallon plastic drum and tumbled on a horizontal axel. It was just one step up from homemade and I feel that technology has come a long way. I look forward to being able to give an informed review on my new composter soon.

This looks like it is going to be a good year for my avocado tree this year. Lots of small fruit and the fruit seem to be staying on the tree this year. Also have fruit setting on my orange and lemon trees.

In the garden plot itself are zucchini, garlic and tomatoes. This year I am mainly growing tomatoes grown from seeds collected from COSTCO tomatoes. May have a little bit of fusarium/verticillium wilt. I guess that next year I will getting plants labeled VF at the nursery to overcome this issue. I did grow a type of tomato last year called Juliette (a grape tomato) but was unable to find it this year in the nursery.

I have been going on line and saw directions for an upside-down hanging planter. I know have another tomato plant growing in the back yard and we will see how it does. I kept seeing the ads on late-night television for a very similar product and I kept debating about buying the product but just couldn’t bring myself to order it and pay SHIPPING & HANDLING. That phrase always bothers me, S&H.

Ron is getting ready to get out of school for Summer Break and his band is getting a few gigs so he is having fun. BubbaJam is the band and I go along and help hump some of the equipment… just call me a roady. Nobody in the group really drinks but they usually get a meal as part of the deal and I have a habit of going anywhere for free food.

We have been doing our part to bring clutter under control at the homestead… freecycler and Craigslist are getting a lot of use. Ron still get a thrill every time he puts a listing on Craigslist… it is almost like he clicks the stopwatch and sees how long it takes to get a reply. The one thing we have found out is that if something doesn’t sell on line the first time you list it you need to have patience and repost it again, and again as needed. Some stuff has lasted 15 minutes before a buyer was found and other things have take a couple of weeks to a month but eventually stuff sells.

We don’t have travel plans for this year… staying close to home, garden and band gigs. Our household is very happy with Obama and even with everything that is going on with the economy we still feel better and happier than we were at this time last year… what a difference a day can make and a President… so much for my political rant.


REDUCE, REUSE and RECYCLE

Comments are always welcome.